
JC CONTRAST
JC Contrast is a precision contrast-shaping DCTL for DaVinci Resolve designed for colourists who want more control than a basic contrast slider, without constantly reaching for fragile custom curves.
Most contrast tools give you a single global move: increase contrast and the whole image bends with it. JC Contrast takes a more deliberate approach. It builds contrast around a stable mid-grey pivot, using a central linear contrast spine with independently adjustable toe and shoulder roll-off. This allows you to increase midtone separation while protecting shadows and highlights in a smooth, filmic way.
The result is a contrast tool that can behave like a clean technical contrast control, a soft print-style tonal shaper, or a more traditional S-curve — depending on how you set it. It is especially suited to DaVinci Wide Gamut / Intermediate workflows, where controlled tonal shaping upstream of a look, LUT, print emulation, or DRT can make a major difference to the final image.
JC Contrast is designed for colourists who want contrast that feels intentional, smooth, and photographic — not crunchy, clipped, or overly digital.
WHAT IT DOES
JC Contrast lets you shape the tonal response of an image using a custom contrast curve built around three main regions:
1. The central contrast spine
The middle of the image receives clean, pivot-based contrast. This gives you a stable tonal region where midtones can be separated without the entire image feeling randomly bent.
2. The toe
The lower part of the curve compresses smoothly into the shadows, allowing you to deepen blacks while preserving shadow behaviour.
3. The shoulder
The upper part of the curve rolls off smoothly into the highlights, allowing you to add contrast while keeping highlights controlled and graceful.
Unlike a simple S-curve, JC Contrast gives you direct control over where the toe and shoulder begin, how strongly they roll off, how colour is preserved, and whether the curve behaves more like a technical contrast tool or a stylised tonal response.
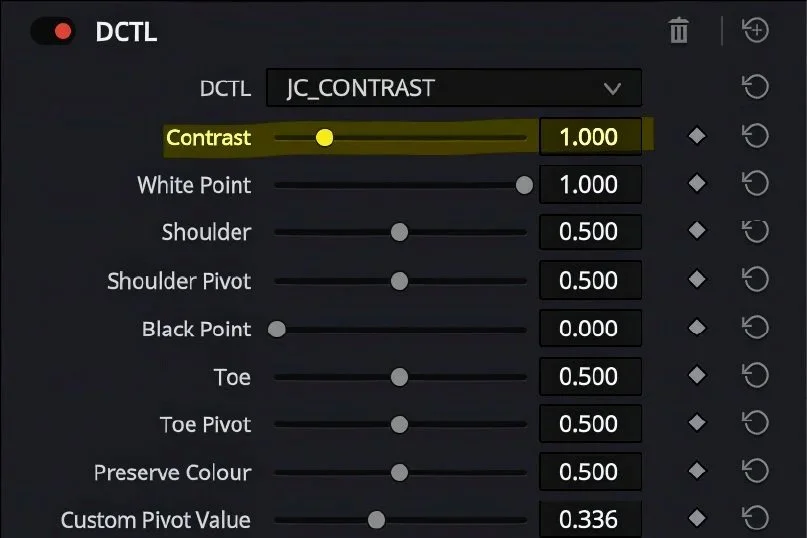
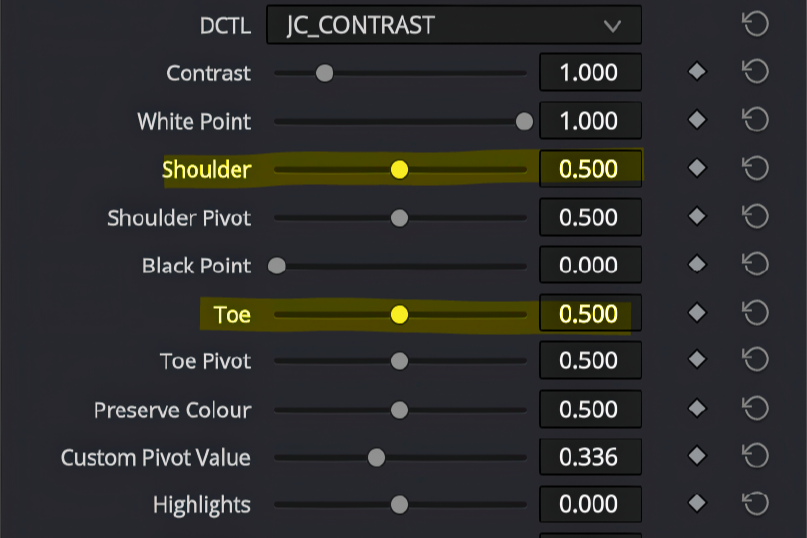
CONTROLS
Controls the main contrast strength.
At the default value of 1.0, the image is unchanged. Increasing Contrast raises separation around the active pivot, while decreasing it reduces contrast.
The core positive contrast behaviour is built around a pivoted linear spine, meaning the centre of the curve can remain clean and stable while the toe and shoulder manage the extremes.
Use this as the main “amount” control.
CONTRAST
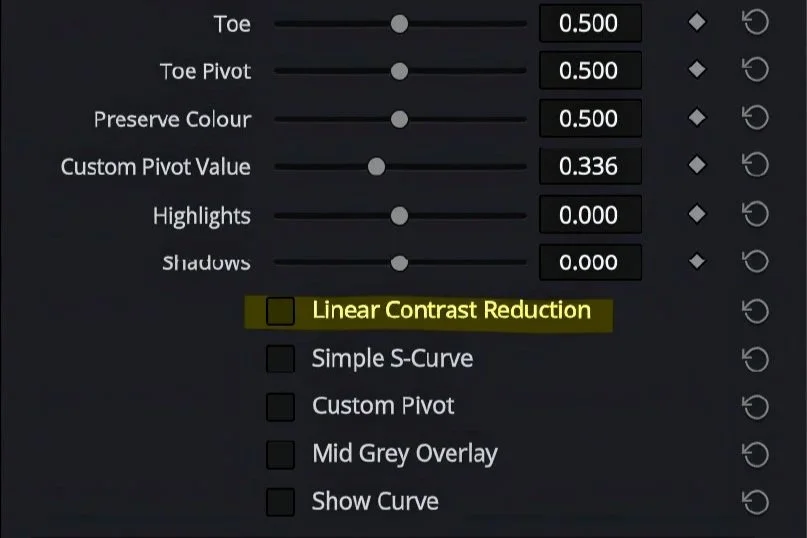
LINEAR CONTRAST REDUCTION
Changes how the tool behaves when Contrast is below 1.0.
When enabled, reduced contrast behaves more like Resolve’s basic contrast control: a simple pivoted linear reduction. This is cleaner and more predictable if you just want to flatten contrast without extra curve shaping.
When disabled, reduced contrast uses a softer contour-style behaviour, relaxing the image in a more curved, photographic way.
Use this when you want de-contrast to feel simpler, cleaner, and more technical.
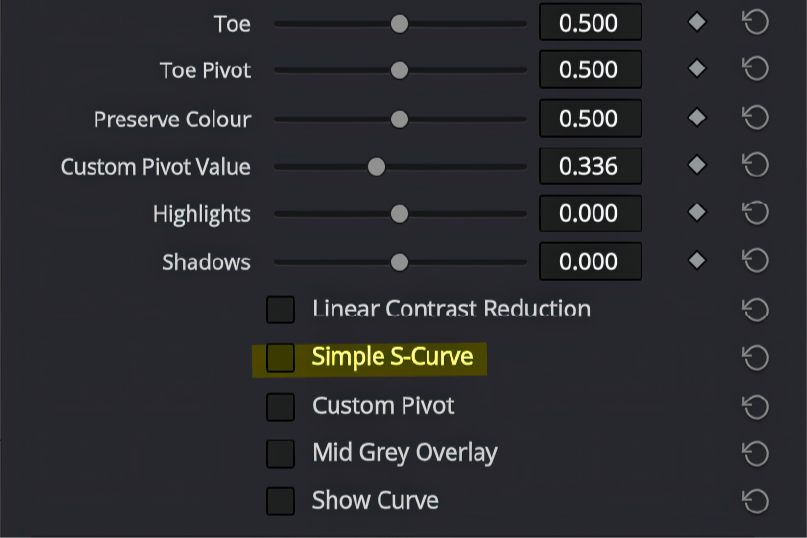
Switches the tool into a simpler pivot-based S-curve mode.
In the default mode, JC Contrast uses its more advanced linear-spine model with separate toe and shoulder roll-off controls. In Simple S-Curve mode, the tool behaves more like a traditional S-curve: contrast is concentrated around the pivot and the tonal response bends smoothly toward black and white.
Use this when you want a faster, more familiar S-curve-style contrast shape.
SIMPLE S-CURVE
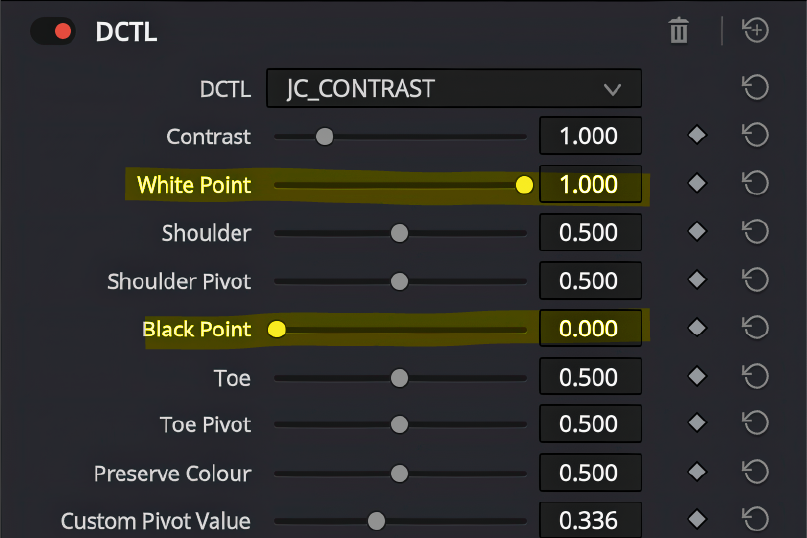
Controls a soft threshold for the top and bottom of the picture.
This is not a hard clipping point. Instead, it works as a capped soft-clip style control, gently compressing values as they approach the top or bottom of the image.
Lowering White Point can help set a gentle but firm ceiling for the image, preventing harsh digital clipping.
Raising Black Point creates a soft floor for the image.
Use carefully. Small moves are often enough.
WHITE & BLACK POINT
SHOULDER & TOE
Controls the softness and strength of the shadow and highlight roll-offs.
Toe shapes how the lower part of the curve compresses into the shadows, while Shoulder shapes how the upper part of the curve compresses into the highlights. Higher values create a gentler, more extended roll-off. Lower values allow stronger contrast to continue further into the shadows or highlights before the curve compresses more assertively.
Use these controls to decide how protected, dense, open, or compressed the shadow and highlight regions feel after adding contrast.
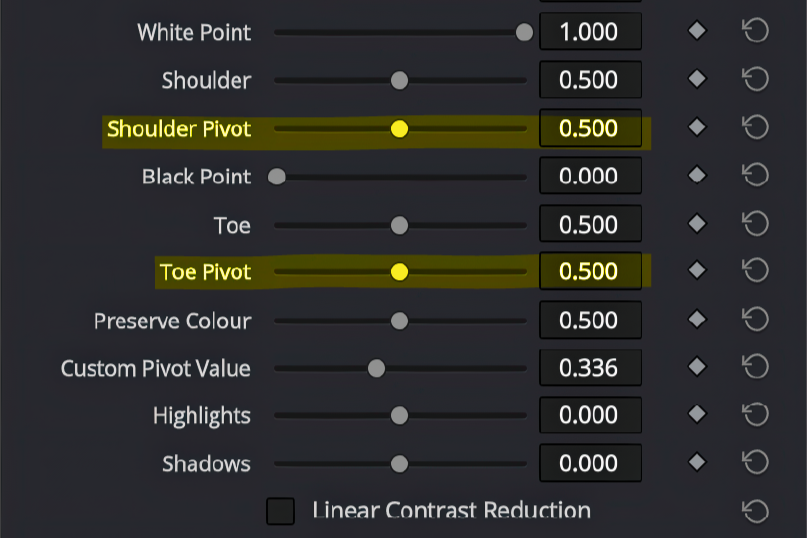
SHOULDER & TOE PIVOTS
The Toe Pivot and Shoulder Pivot control where the shadow and highlight roll-offs begin in relation to the central contrast pivot.
Together, they define the size of the clean central contrast region. Moving the pivots closer to the centre creates a narrower linear section, so the curve behaves more like a traditional S-curve, with contrast concentrated more tightly around mid-grey. Moving them farther away creates a wider linear section, preserving clean, consistent contrast through more of the image before the shadows and highlights begin to compress.
Use these controls to decide how much of the image receives full contrast, and how early the toe and shoulder begin protecting the shadows and highlights.
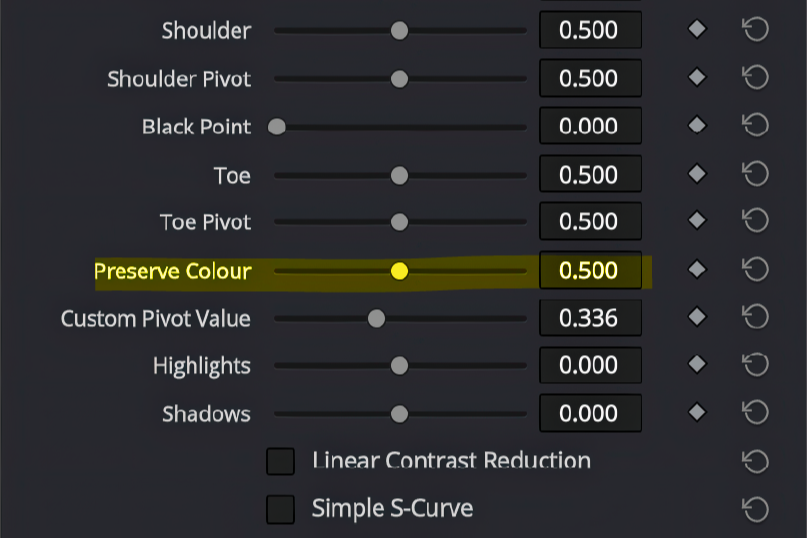
PRESERVE COLOUR
Blends between normal RGB contrast and a preserve-colour contrast model.
At 0.0, contrast is applied per RGB channel. This can increase saturation and colour separation as contrast is added, which may be desirable for a stronger, more traditional RGB contrast response.
At 1.0, contrast is applied through a neutral-axis colour model, helping preserve hue and reduce unwanted saturation shifts.
The default middle value gives a balanced result: some natural colour response from contrast, but with protection against excessive colour distortion.
Use this control to decide how much contrast should affect colourfulness.
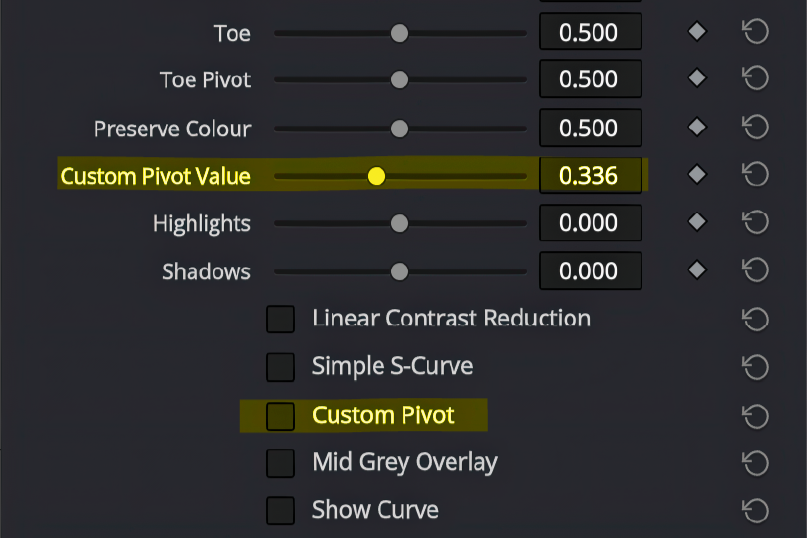
CUSTOM PIVOT
Enables manual control over the tonal point that the contrast curve rotates around.
By default, JC Contrast uses a DaVinci Wide Gamut / Intermediate-style mid-grey pivot of 0.336, which is a sensible centre point for DWG workflows. When Custom Pivot is enabled, the Custom Pivot Value slider becomes active, allowing you to choose a different anchor point for the contrast move.
Lower pivot values anchor the contrast deeper in the image, while higher pivot values anchor it further into the upper tonal range.
Use this when working outside a standard DWG setup, or when you deliberately want the contrast behaviour to centre around a different exposure point.
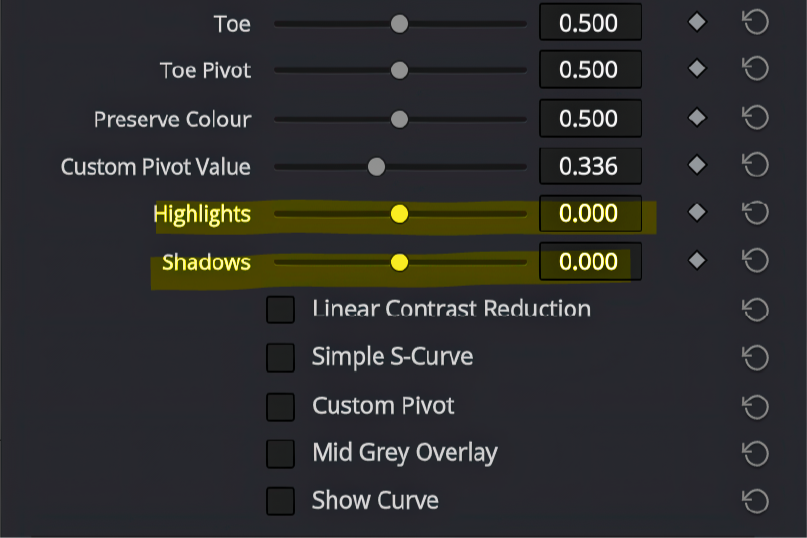
HIGHLIGHTS & SHADOWS
Applies additional highlight and shadow trims after the main contrast curve.
These controls are designed for subtle finishing adjustments once the main curve shape is already set. Highlights adjusts the upper tonal range, allowing you to gently lift, lower, expand, or compress brighter values. Shadows does the same for the lower tonal range, helping you refine shadow density, lift, or compression.
Use these like small custom-curve refinements: set the main contrast, toe, shoulder, and pivots first, then use Highlights and Shadows for final tonal polish.
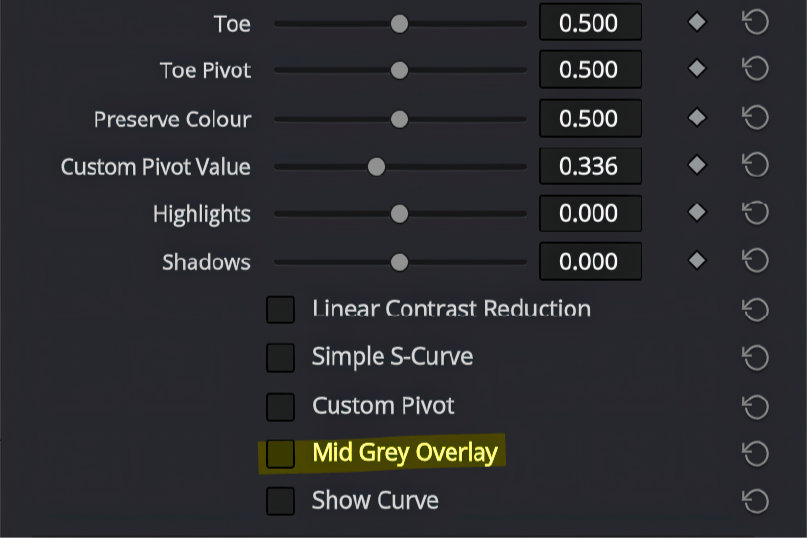
MID GREY OVERLAY
Displays a visual overlay showing pixels near the active pivot value.
This is useful for seeing where the tool’s centre of gravity is in the image. Since contrast is built around the active pivot, the overlay helps you understand which parts of the image are being treated as the tonal centre.
Use this when setting exposure, pivot, or deciding where the main contrast move should be anchored.
What Sets Us Apart
People-First Approach
Everything we do is built around understanding your needs and helping you succeed—because when you thrive, so do we.
Long-Term Relationships
We’re not just here for the now. We love creating lasting relationships with our clients and growing with them over time.
Proven Process, Flexible Execution
We bring structure where it counts and adaptability where it matters. Our methods are clear, but always responsive.